1.Fitting the Following vehicle:
2007-2014 Ford Expedition
2009-2014 Ford F-150
2007-2014 Lincoln Navigator
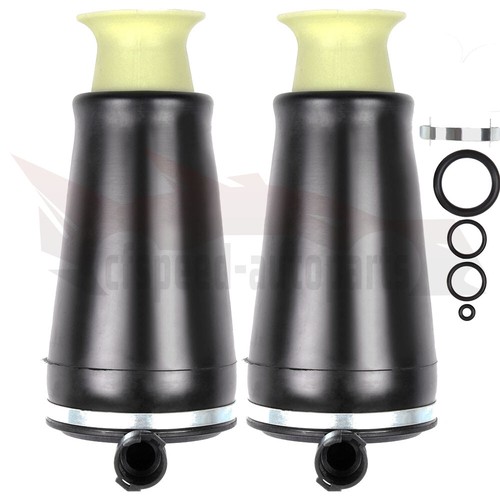
2.Package Includes:
2 x Part# Front Lower Ball Joint
1 x Part# Front Left Upper Control Arm and Ball Joint Assembly(Upper Ball Joints come Pre-Assembled onto the Upper Control Arms)
1 x Part# Front Right Upper Control Arm and Ball Joint Assembly(Upper Ball Joints come Pre-Assembled onto the Upper Control Arms)
3.Note
Although some parts have grease fittings, other parts are factory sealed, but do not affect the fit and quality of the parts.
Please check above compatibility list to make sure it fits your vehicle.
If you want to find more about suspension kits,clicking our store.
Suspension Control Arm
Control arms are installed in pairs on the front and rear axle and connect the chassis to the wheels as part of the suspension. Therefore, they have a significant influence on the driving characteristics of the vehicle.
A dynamic or a comfortable driving style? The control arms are individually adjusted to the vehicle depending on the desired characteristics. They also absorb lateral movements and forces resulting from driving off and braking.

Suspension Control Arm Replacement Guideline:
Control arms are installed in pairs on the front and rear axle and connect the chassis to the wheels as part of the suspension. Therefore, they have a significant influence on the driving characteristics of the vehicle.
A dynamic or a comfortable driving style? The control arms are individually adjusted to the vehicle depending on the desired characteristics. They also absorb lateral movements and forces resulting from driving off and braking.

Picture(A)
A defective control arm can manifest in the following ways:
(1).Noise (squeaking, creaking, rumbling).
(2).Deteriorating driveability.
(3).Increasingly woolly and imprecise steering.
(4).Uneven tyre wear.
Tip:If the control arm is in working order, it is possible to only replace the defective bearings and joints. However, replacing bearings, control arm bushings and ball joints can be very complex and costly.


Picture(B)
1.First lift the vehicle using a car lift, ideally a wheel-free four-post car lift. This makes it easier to correctly tighten the control arm fixing screws.
WARNING:Depending on the axle design, the control arm may need to be secured against falling with a suitable device, e.g. a transmission lifter.
2.Treat the fixing screws and nuts of the control arm with rust solvent and leave it to work for a few minutes so that they are easier to loosen.
3.On vehicles with automatic headlight levelling, it may be necessary to detach the leveling sensor from the control arm.
Picture(C)
4.If the stabilizer is connected to the control arm, the next step is to loosen and remove the corresponding stabiliser fixing screws.
5.Loosen and remove the control arm fixing screws.
6.Loosen the ball joint at the steering knuckle with a suitable special tool (e.g. a puller).
7.Remove the old control arm.


Picture(D)
8.Clean the mounting flange of the ball joint pin on the steering knuckle with sandpaper and then with brake cleaner. Otherwise single rust particles can enter the new control arm joint via the ball pin, potentially leading to premature failure of the joint.
Picture(E)
9.Fit the new control arm with the supplied accessories and attach new fixing screws and nuts.


Picture(F)
10.Reattach the stabilizer and, if applicable, the leveling sensor for headlight leveling to the control arm.
NOTE:Do not tighten the fixing screws and nuts in this step, otherwise the rubber mounts will twist when the suspension compresses. This would lead to undesired preloading onf the mounts.
Picture(G)
11.Now lower the vehicle until the suspension is compressed. Depending on vehicle type, load or unload the vehicle until the required height published in the specific installation instruction is reached. This is where a wheel-free four-post car lift is advantageous, as the underside of the vehicle can still be easily accessed once lowered.
12.Tighten the fixing screws with the torque stipulated by the vehicle manufacturer.
13.Lower the vehicle all the way.
14.Measure the chassis and adjust if necessary.
15.Check and, if necessary, adjust the headlight settings on vehicles with automatic headlight leveling where the leveling sensor is attached to the control arm.
16.To conclude, test-drive the vehicle.
Ball Joint
Ball joints may be grouped into two classifications, load carrying and non-load carrying. Ball joints may be manufactured with forged, stamped, cold-formed, or screw-machined housings. The coil spring is seated on the control arm to which the load-carrying ball joint is attached. For example, when the coil spring is mounted between the lower control arm and the chassis, the lower ball joint is a load-carrying joint. In a torsion bar suspension, the load-carrying ball joint is mounted on the control arm to which the torsion bar is attached. A load-carrying ball joint supports the vehicle weight.

Ball Joint Replacement Guideline:
If there is a knocking or clunking noise in the area of the front axle when the car is traveling over road bumps, potholes or curbs, then there is usually a defect in a component of the wheel suspension.

Picture(A)
The side of the front axle from which the (vibration) noise is emanating can already be determined during a test drive. The type of noise also already provides certain indications for maintenance regarding which components might be faulty.


Picture(B)
1.Raise the vehicle and remove the front wheels.
2.To loosen the fastening screws and fixing nuts of the compression ball joint more easily, spray them with rust remover and allow to act for a few minutes.
Picture(C)
3.Loosen the fastening screws of the broken ball joint on the control arm and remove the nuts.


Picture(D)
4.Loosen and remove the fixing nut of the ball joint on the steering knuckle.
Tip:If the ball stud rotates, hold the ball stud in place with a hexagon socket.
Picture(E)
5.Remove the bad or worn ball joint from the control arm.
6.Loosen the compression ball joint on the steering knuckle using a suitable special tool.


Picture(F)
7.Clean the cone connection.
Tip:For better sealing and durability of the ball joint sleeve, a little silicone grease can be applied to the contact surface.
Picture(G)
8.Insert new compression ball joint in the control arm and steering knuckle and tighten with new fixing nuts.
9.Reinstall front wheels. Lower the vehicle and tighten the wheel studs to the tightening torque specified by the vehicle manufacturer.
10.Measure the chassis and adjust it using the various holes on the compression ball joint if necessary.
11.Finally, carry out a test drive.
Frequently Asked Questions
(1).What's the function of control arm?
The control arm connects the hub and the frame of the car. There are ball joints on the hub side and bushings on the frame side to achieve up and down instead of forward and rearward.
(2).What is the significance of the control arm for the car?
As an important part of the car suspension, the control arm is used to transmit the required supporting force of the wheel and to withstand all the front and rear direction stresses. It is an important safety part of the chassis system. Therefore, it requires high strength and reliability in the design. Its fatigue strength is directly related to the safety of vehicles and members.
(3).How to tell the quality of control arm?
Look at the materials and processing of the control arm: the materials used to control the arm, common are steel and aluminum alloy. In ordinary family cars, steel control arms are very common, and the basic appeal is to meet the strength while controlling costs. In the middle and high-end models, you will see the control arm of the aluminum alloy and the wheel bearing housing. In addition to meeting the strength of the suspension, this material can further reduce the weight and reduce the weight of the suspension spring to improve the suspension response. Improve driving performance.
Look at chassis protection and workmanship: Regarding chassis protection, we mainly pay attention to whether it is equipped with engine under guard, whether there is coating or cover at the bottom of the car body, whether the oil pipe is covered with a guard plate, whether the front and rear wheel arches are protected. Board or coating coverage, etc.
(4).Do I need to replace the control arm if the bushings are worn? What is the safety risk?
Because the weight of the car is transferred through the control arm two rubber bushings are fitted at the pivot point and bolted to the frame. Road conditions and driving habits can contribute to the wear of these bushings which will become worn and fall apart. These bushing can be inspected by raising the car up and looking for an irregular configuration of the rubber center of the bushing. Many control arms have the ball joint manufactured into the arm which will be replaced along with the control arm itself. When one control arm is worn it is highly advised to replace the opposing arm.
(5).What is the average cost of replacing control arms?
The cost to replace control arms depend on the vehicle. Control arms cost different amounts depending on the vehicle, as well as the labor to install. Some are easy to install and take little time, while others can take several hours.
(6).How will I know that I have to renew my ball joint parts? Or replace them?
If your ball joint fails, you will listen to a strange sound while driving. And that sound may help you to realize that your ball joint has failed and you have to renew them.
(7).What happens if a ball joint breaks?
When a ball joint breaks, you will hear a mysterious noise inside your car wheel.
Your car tire will wear-out since your alignment will be broken, and you will feel the car getting out of control.
If the ball joint breaks completely, it can be separated, and things can turn sour quickly. The wheel will stop being nice and can even steer you off the road. It can be serious.
Broken ball joints will seriously affect the steering and suspension. It can even result in your wheel falling off the car.
(8).Are worn ball joints dangerous?
Yes, it can be quite dangerous. Because, a worn ball joint causes suspension damage, inspection failure, and breakage of related parts.
It might make your front suspension come apart while driving, so the wheels move in whatever direction inertia takes them. That can lead to a fatal accident.
(9).What happens if I don't replace ball joints?
If you don't want to replace your ball joints, then get ready to experience some serious issues. The old ball joints cause mysterious clunking noise or drifting steering. Once they are worn-out, it will seriously affect your steering and suspension. However, you do not need to change the ball joints if it is new.
(10).Do I need to grease new ball joints?
I would say it will be a wise decision if you grease your new ball joints. At least I will always grease a new one after the installation. Greasing a new ball joint will make it stronger and extend its lifetime because there is a minimal amount of grease inside. I suggest you do so after the first installation. Follow the instruction card.